

Building a new home is an exciting milestone, but moving in often means staring out the window at a massive blank canvas of dirt. Transforming a bare lot into a thriving, beautiful outdoor living space is a major project that requires careful engineering, precise planning, and an understanding of local soil and climate conditions. Let’s take a look at the landscape installation process!
Urban landscape irrigation accounts for up to 65% of annual municipal water use according to Utah State University Extension research, which is why a structured, step-by-step landscape installation process is crucial to protect your financial investment and our local water supply.
Phase 1: Landscape Installation Safety and Leal Planning
Before a single shovel touches the dirt, there are critical legal and safety steps that must be taken to protect your property, your neighbors, and your wallet.
Contacting Blue Stakes Utility Locators for Property Safety during Landscape Installation
The absolute first step of any residential excavation is contacting Blue Stakes. This is a free service to the public that coordinates with local utility companies to mark underground power lines, culinary water lines, gas lines, and communication cables. Skipping this step risks costly utility repairs, dangerous service disruptions, and massive legal liability if a main line is severed.
Securing Local City Permits for Outdoor Structures
Depending on your final design, you may need to secure local city permits before construction begins. While standard lawns and flower beds don’t require paperwork, permits are typically mandatory for:
- Oversized sheds or accessory structures that require a concrete foundation.
- Swimming pools, hot tubs, and in-ground spas.
- Retaining walls over a specific height (typically 4 feet in most Utah municipalities).
- Large decks or permanent pergolas attached to the home.
Phase 2: Grading and Layout for New Landscape Installation
Professional landscape installation officially begins once the home builders have set the final grade or slope.
Maintaining the Final Grade for Drainage Controls
The final grade is the calculated slope of the dirt designed to guide rainwater and snowmelt safely away from your home’s foundation. Preserving this slope is vital during the rest of the installation to prevent basement flooding or pooling water.
Mapping the Functional Zones of the Yard
With the canvas clear, it’s time to map out your layout. This is where you determine the exact placement of your yard’s main features:
- Hardscapes: Patios, walkways, decks, and fire pits.
- Softscapes: Areas dedicated to turf grass, annual/perennial flower beds, and vegetable gardens.
Phase 3: Sprinkler System Design and Smart Irrigation Zones
An efficient irrigation system is the backbone of a healthy yard. A poorly designed system results in dead plants, wasted water, and sky-high utility bills.
Crucial Plumbing Requirements and Legal Codes
When tying into your water source, specific mechanical components must be installed to protect your home and meet local legal codes:
- Stop-and-Waste Valves: You must install a stop-and-waste valve below the frost line. This applies whether you are tying into your culinary water line or utilizing a secondary irrigation water line.
- Backflow Preventer Installation: Installing a backflow preventer is required by law for new installations in Utah and most other states. This crucial safety device prevents stagnant sprinkler water and lawn fertilizers from siphoning backward into clean drinking water.
- Testing Main Line Water Pressure (PSI): Before building out zones, you must double-check the water pressure (PSI) and gallons per minute (GPM) coming from your main supply line. This data dictates exactly how many and what type of sprinkler heads can be placed on a single valve station without losing pressure.
Designing Irrigation Zones by Plant Type and Sun Exposure
An effective system segregates watering zones based on the specific needs of the flora (hydrozoning):
- By Landscape Type: Flower beds, lawns, and vegetable gardens have wildly different watering requirements and should never share a zone.
- By Sun Exposure Throughout the Day: Shady areas under roof lines or large trees require significantly less water than wide-open areas subjected to full afternoon sun. As outlined by the Center for Water-Efficient Landscaping, designing separate zones for sun and shade prevents overwatering, root rot, and fungus.
Drip Line Irrigation Zones vs. Traditional Pop-Up Sprinklers
Choosing how to deliver water to your flower beds makes a major difference in plant health and water conservation:
- Drip Line Irrigation Zones: Ideal for dense flower beds, shrubs, and heavily mulched areas. Drip lines deliver water directly to the root zones, minimizing evaporation loss and reducing weed growth between plants.
- Traditional Pop-Up Sprinklers: Best reserved for wide, ground-cover flower beds or tightly packed annuals where individual drip emitters are impractical.
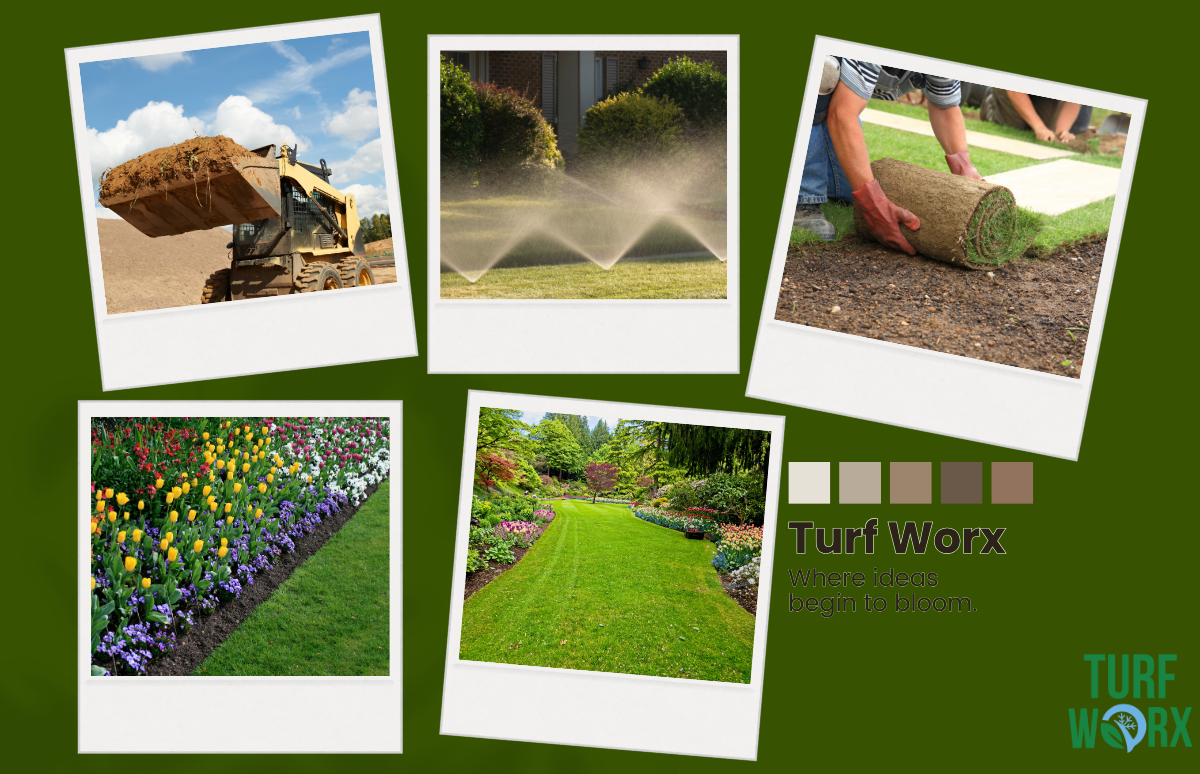
Phase 4: Soil Preparation and Heavy Machinery for Landscape Construction
Once the underground irrigation lines are safely in place, the heavy lifting begins. Transforming poor construction dirt into a fertile environment requires premium topsoil.
🛠️ Professional Equipment for the Job
Moving tons of earth requires heavy machinery to ensure the ground is properly leveled and packed without destroying the final grade. At Turf Worx, we utilize a professional fleet of backhoes and skid steers alongside traditional wheelbarrows and rakes to transport, distribute, and grade topsoil efficiently.
Topsoil must be installed, shaped, and smoothly contoured across all future grass areas, flower beds, and garden boxes to create clean, intentional design lines.
Phase 5: Planting Trees, Shrubs, and Ornamentals for Yard Installation
With the beds formed and filled with rich soil, planting can begin. When selecting and installing your greenery, keep these best practices in mind:
Checking Sun Exposure Tolerances
Double-check the tags on every tree and shrub. Placing a shade-loving hosta in full daylight or a sun-loving rose in deep shade will result in plant failure.
Root Ball and Hole Preparation
Dig holes twice as wide as the root ball, but only as deep as the root ball itself. Gently loosen the outer roots of the root ball if the plant is root-bound in its plastic pot. Planting too deep can suffocate the trunk.
Soil Compacting and Post-Planting Watering for Installing Plants Trees
Post-planting, gently compact the soil to eliminate large air pockets, and give the new plant a deep, thorough watering to help settle the earth and eliminate transplant shock.
Phase 6: Establishing Lawn Areas — Sod Installation vs. Grass Seed Application
The final step to completing your landscape installation is putting down the lawn. Homeowners generally choose between two primary methods:
Pros and Cons of Sod Installation
Sod provides instant gratification and an immediate green yard. It is walkable as soon as the root base connects with the subsoil (typically 2 to 3 weeks) and offers excellent immediate erosion control. However, it comes with a higher initial material and installation cost.
Pros and Cons of Seeding for Lawn Installation
Planting grass seed is highly cost-effective for large acreage and offers a wider variety of specific grass seed blends. The downside is that it requires high maintenance during establishment and takes 4 to 12 weeks to become walkable, depending on weather conditions, germination rates, and soil moisture saturation. There is also a much higher risk of weed competition.
| Method | Advantages | Disadvantages | Walkable Timeline |
| Sod Installation | Instant green yard, great erosion control | Higher upfront cost | 2 – 3 weeks |
| Lawn Seeding | Cost-effective, more seed varieties | High maintenance, weed risk | 4 – 12 weeks |
Partner with Local Landscape Installation Experts
You don’t have to tackle a massive landscape installation entirely on your own. From navigating local permit offices and city codes to digging trenches and operating heavy equipment, executing a flawless yard installation takes immense time and physical labor.
Turf Worx is your trustworthy, experienced, licensed, and insured landscaping partner. We manage every single step of the process—permits, utility safety, professional grading, smart irrigation, and expert planting—to give you a breathtaking landscape built to stand the test of time.
Contact us today to schedule a consultation for your upcoming landscape installation project! Also, upgrade your existing landscaping with our enhancement services!
Turf Worx Landscape Installation Company
Turf Worx Landscape – Snow Removal Services
- Contact
- 7638 S State St Ste A, Midvale, UT 84047
- (801) 474-7000
- Services Offered: New Landscape Installation, Sprinkler System Design & Repair, Sod Installation, Grading, Hardscaping, Commercial & Residential Snow Removal.
- Areas Served: Utah County, Salt Lake County, Davis County, Summit County, Weber County, Heber and Midway
- Licensing: Fully Licensed, Bonded, and Insured.